Receive alerts on closed anomalies
This use case teaches you how to filter anomalies and create an alert only when the closed anomalies contain anomalies on a specific system or node.
To set up alerts for closed anomalies, first, create a closed Boomi process using the Eyer-Partner connector. For detailed instructions on setting up this connector, refer to the Configuring the Eyer Connector documentation.
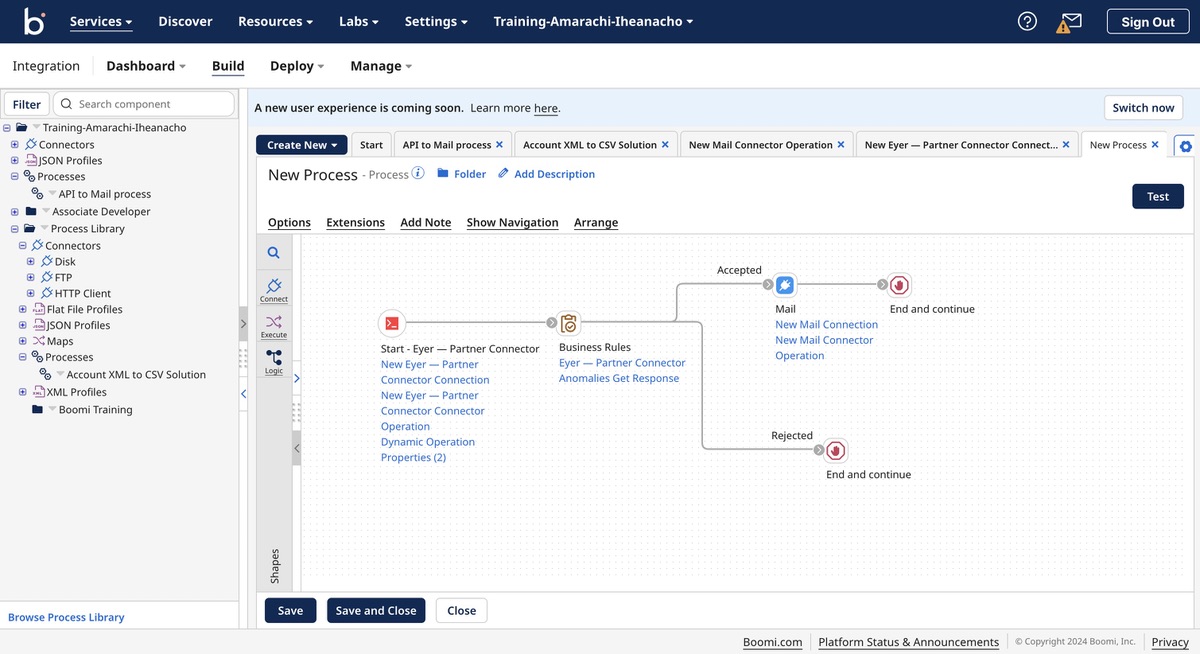
Your process should look like this:
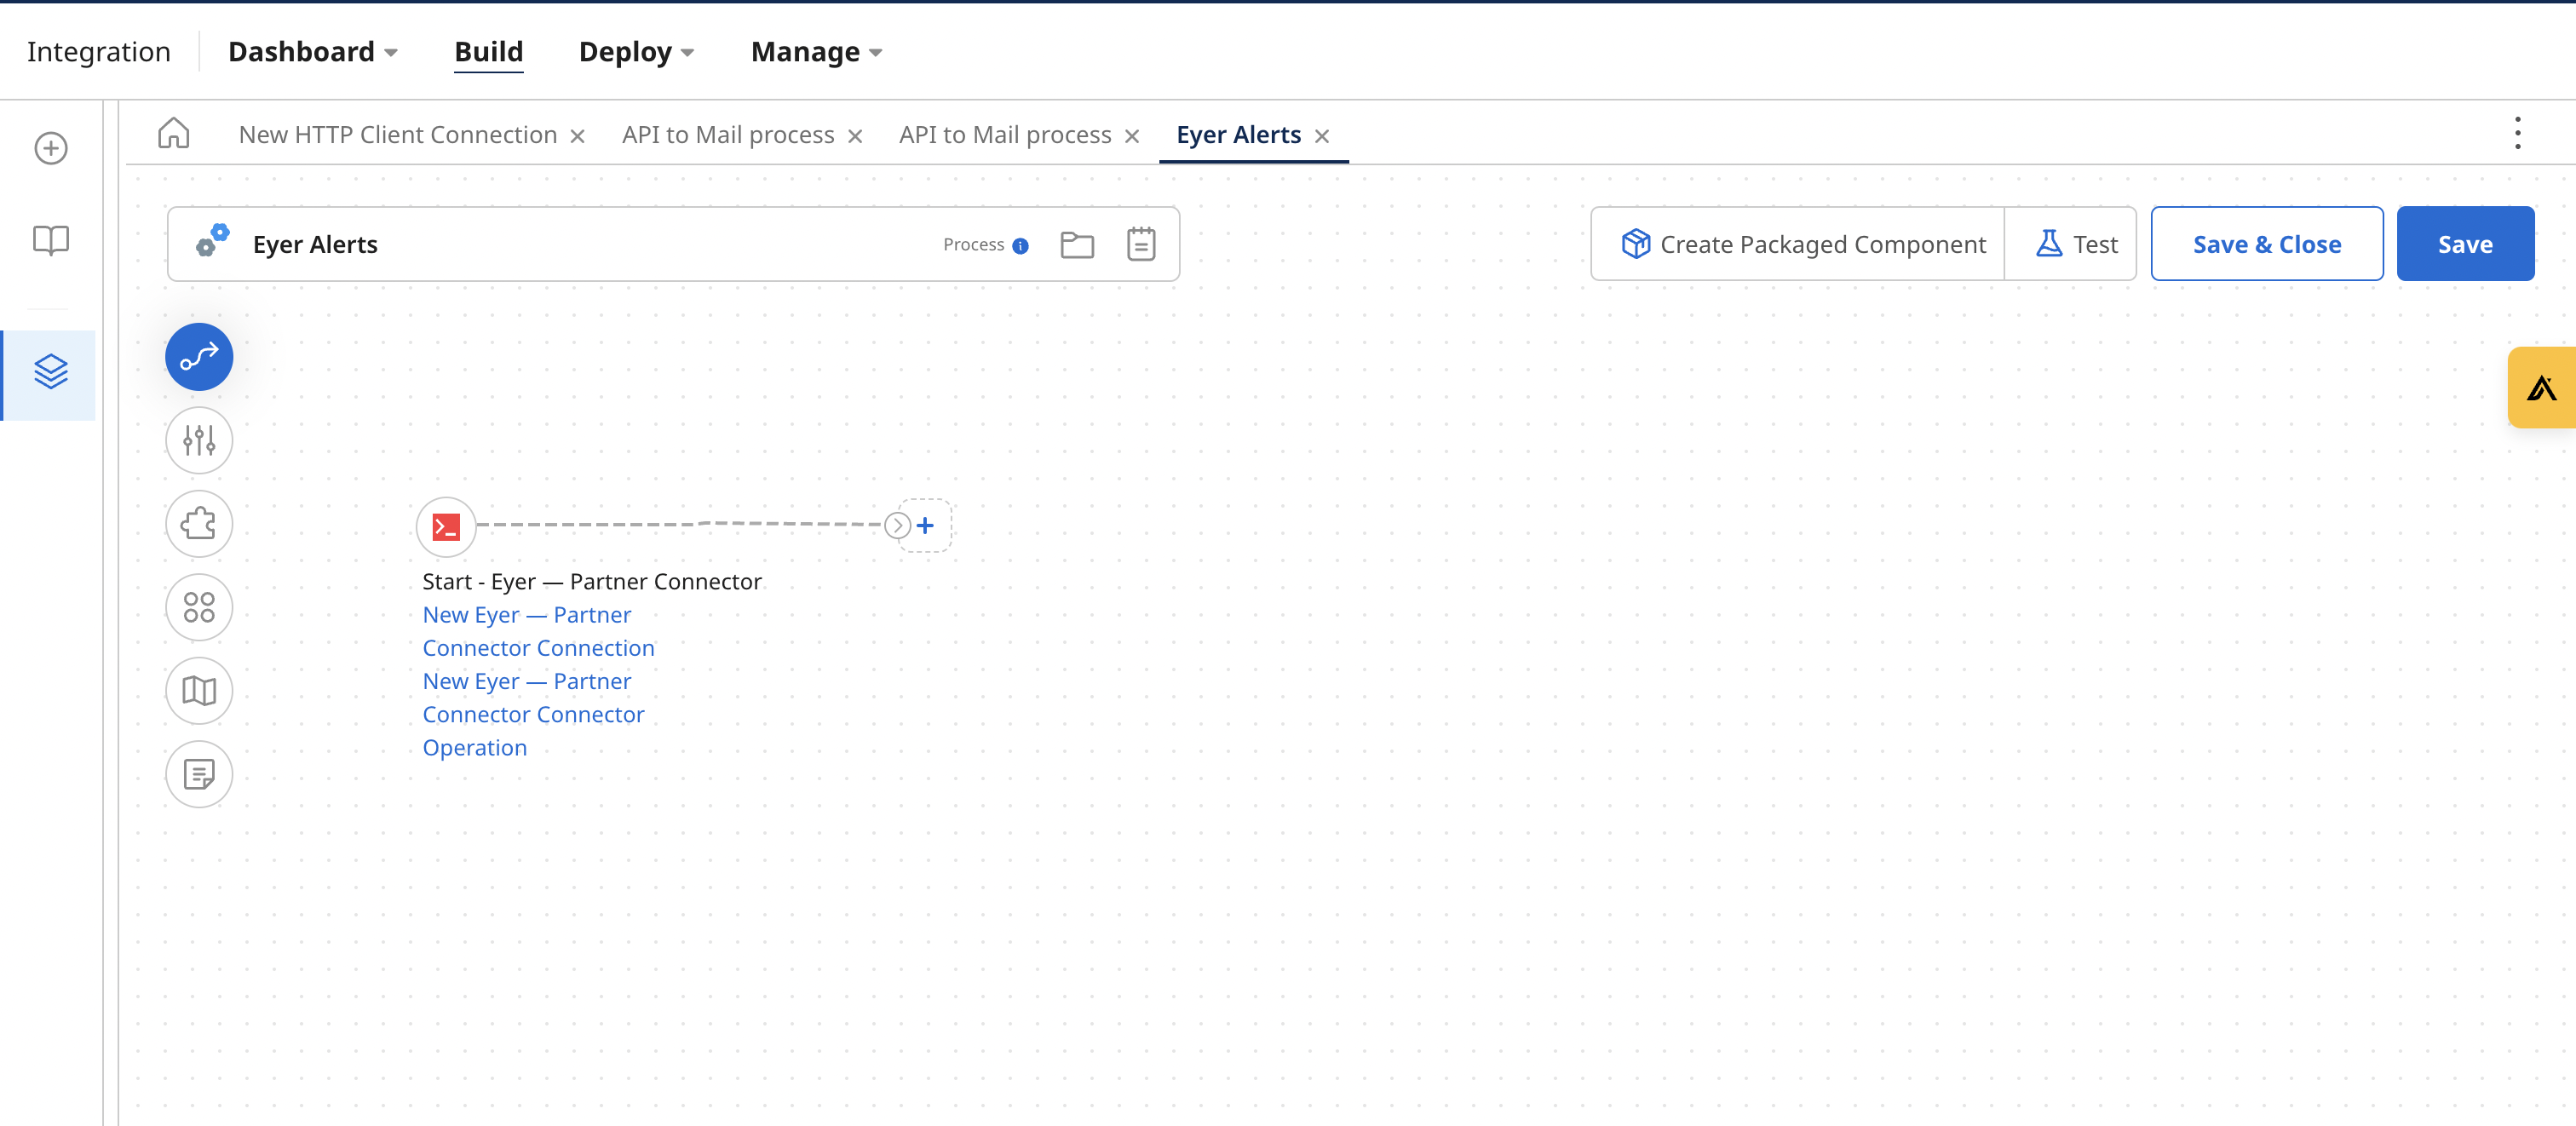
Next, add a Business Rules Shape to filter through the anomalies for closed anomalies.

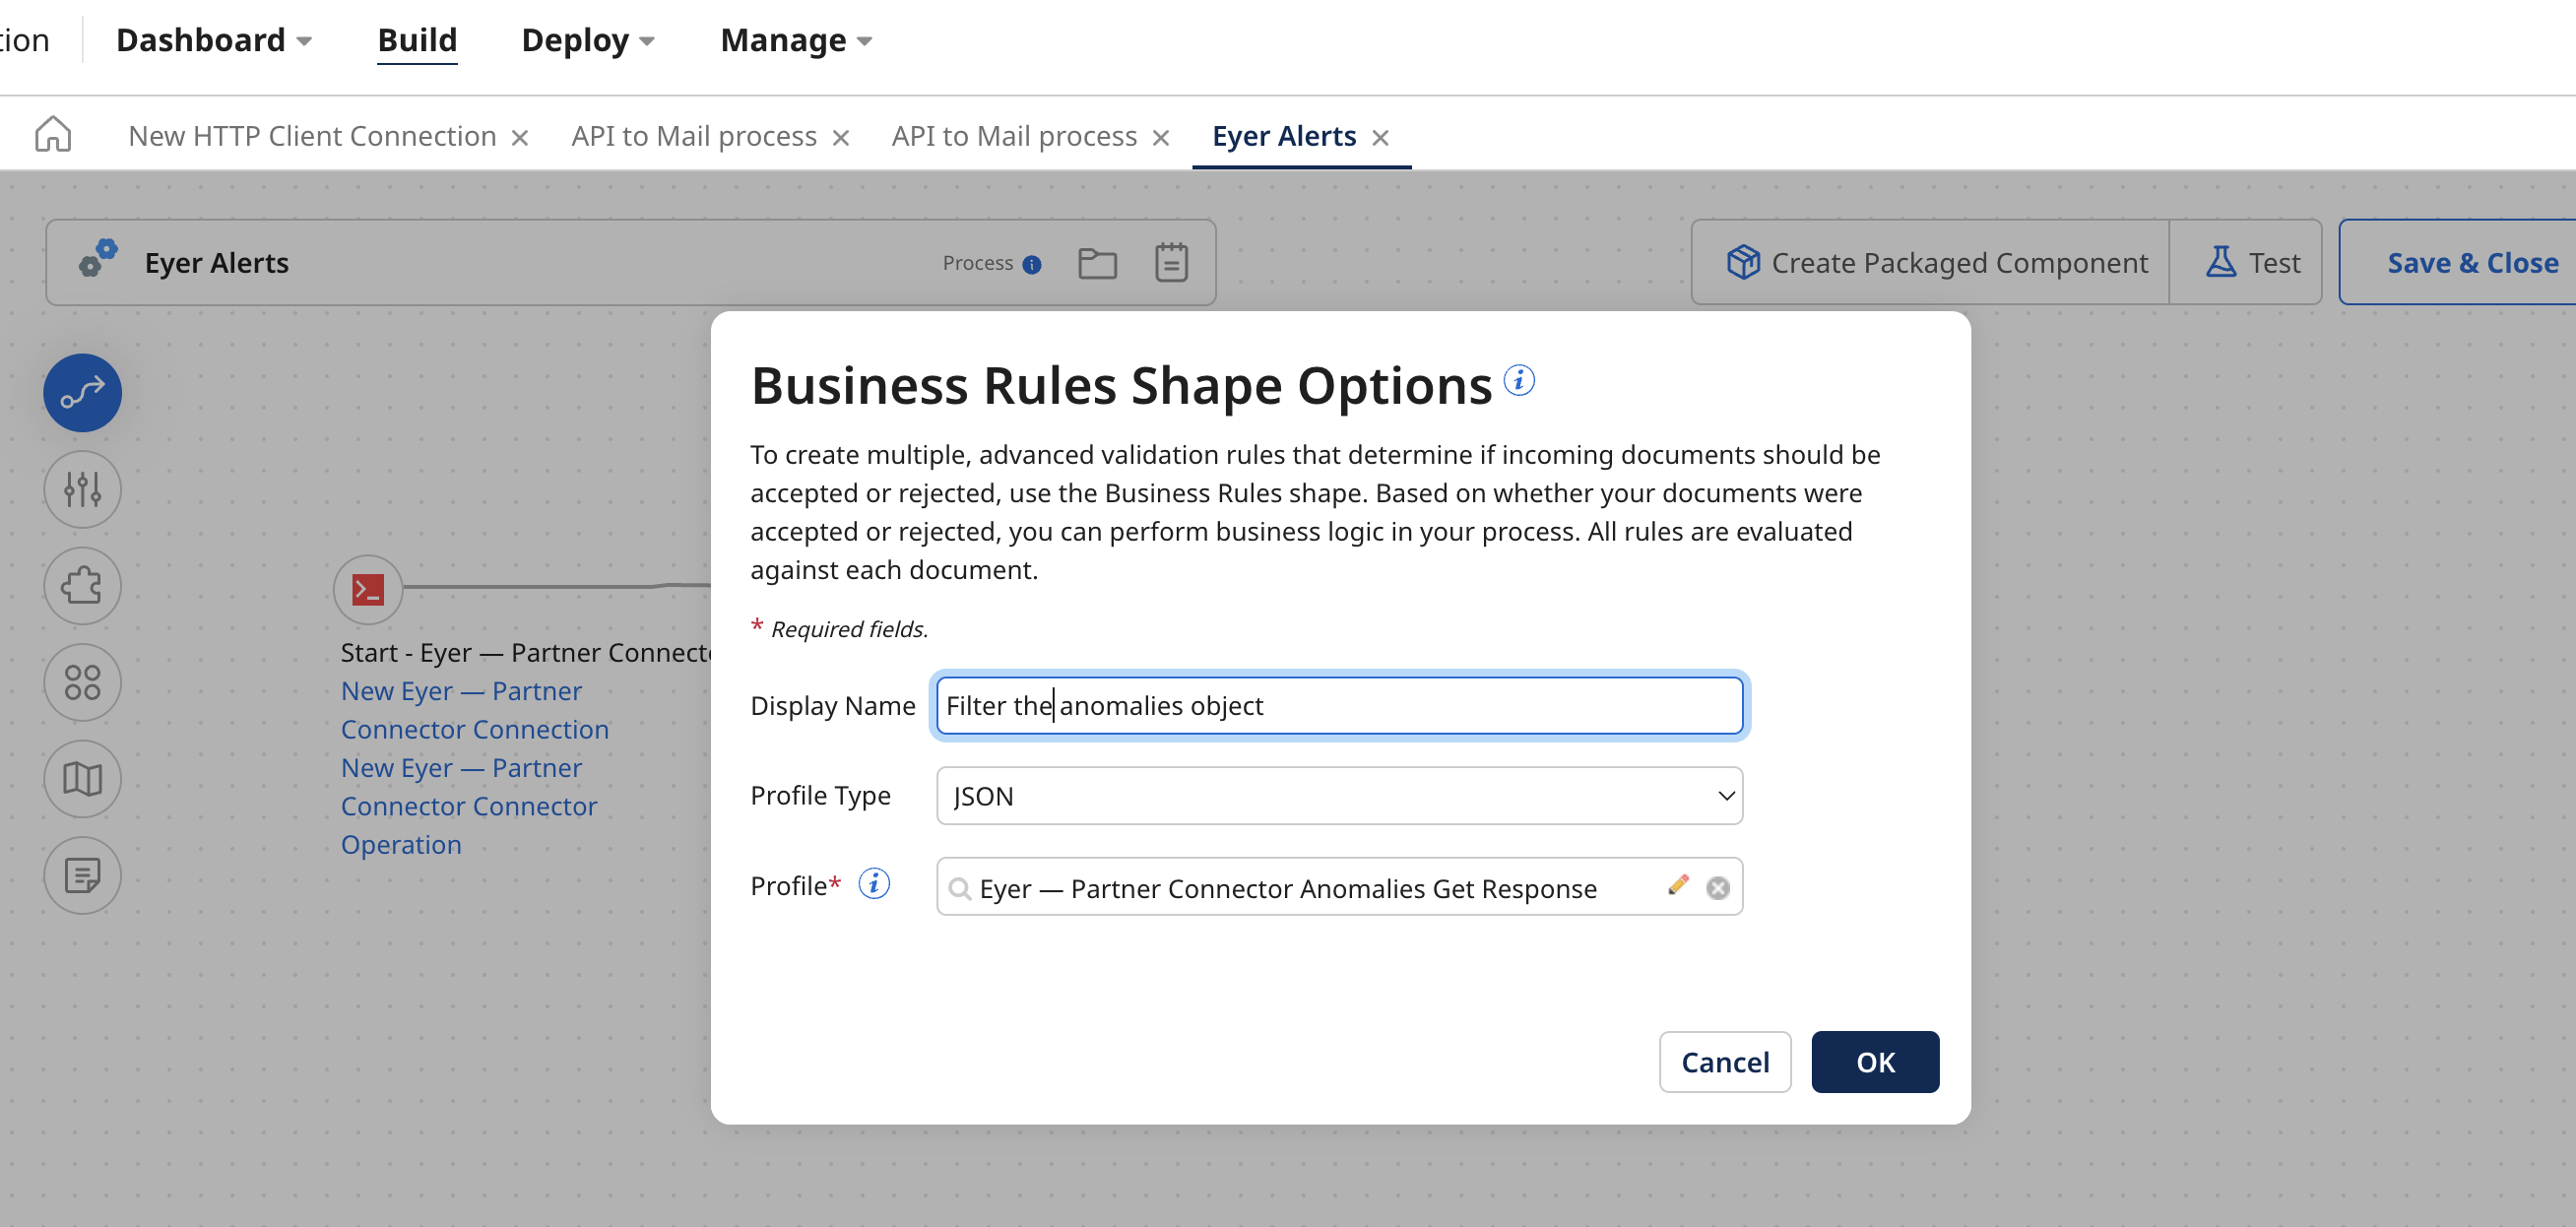
Adding the Business rules shape to your process
The Business Rules Shape allows us to define rules in the Boomi connector. These rules help define certain criteria for your anomaly data.
To create these rules, you need the fields that capture the data from the object you want to check for. Additionally, you need to create conditions that define the criteria for these fields.
Creating the Business Rules fields
Click on the Business Rules shape to open the Business Rules Shape Options modal. In this modal, select a JSON profile type. Select the profile you created in the Profile input field when configuring the Eyer-Partner connector.
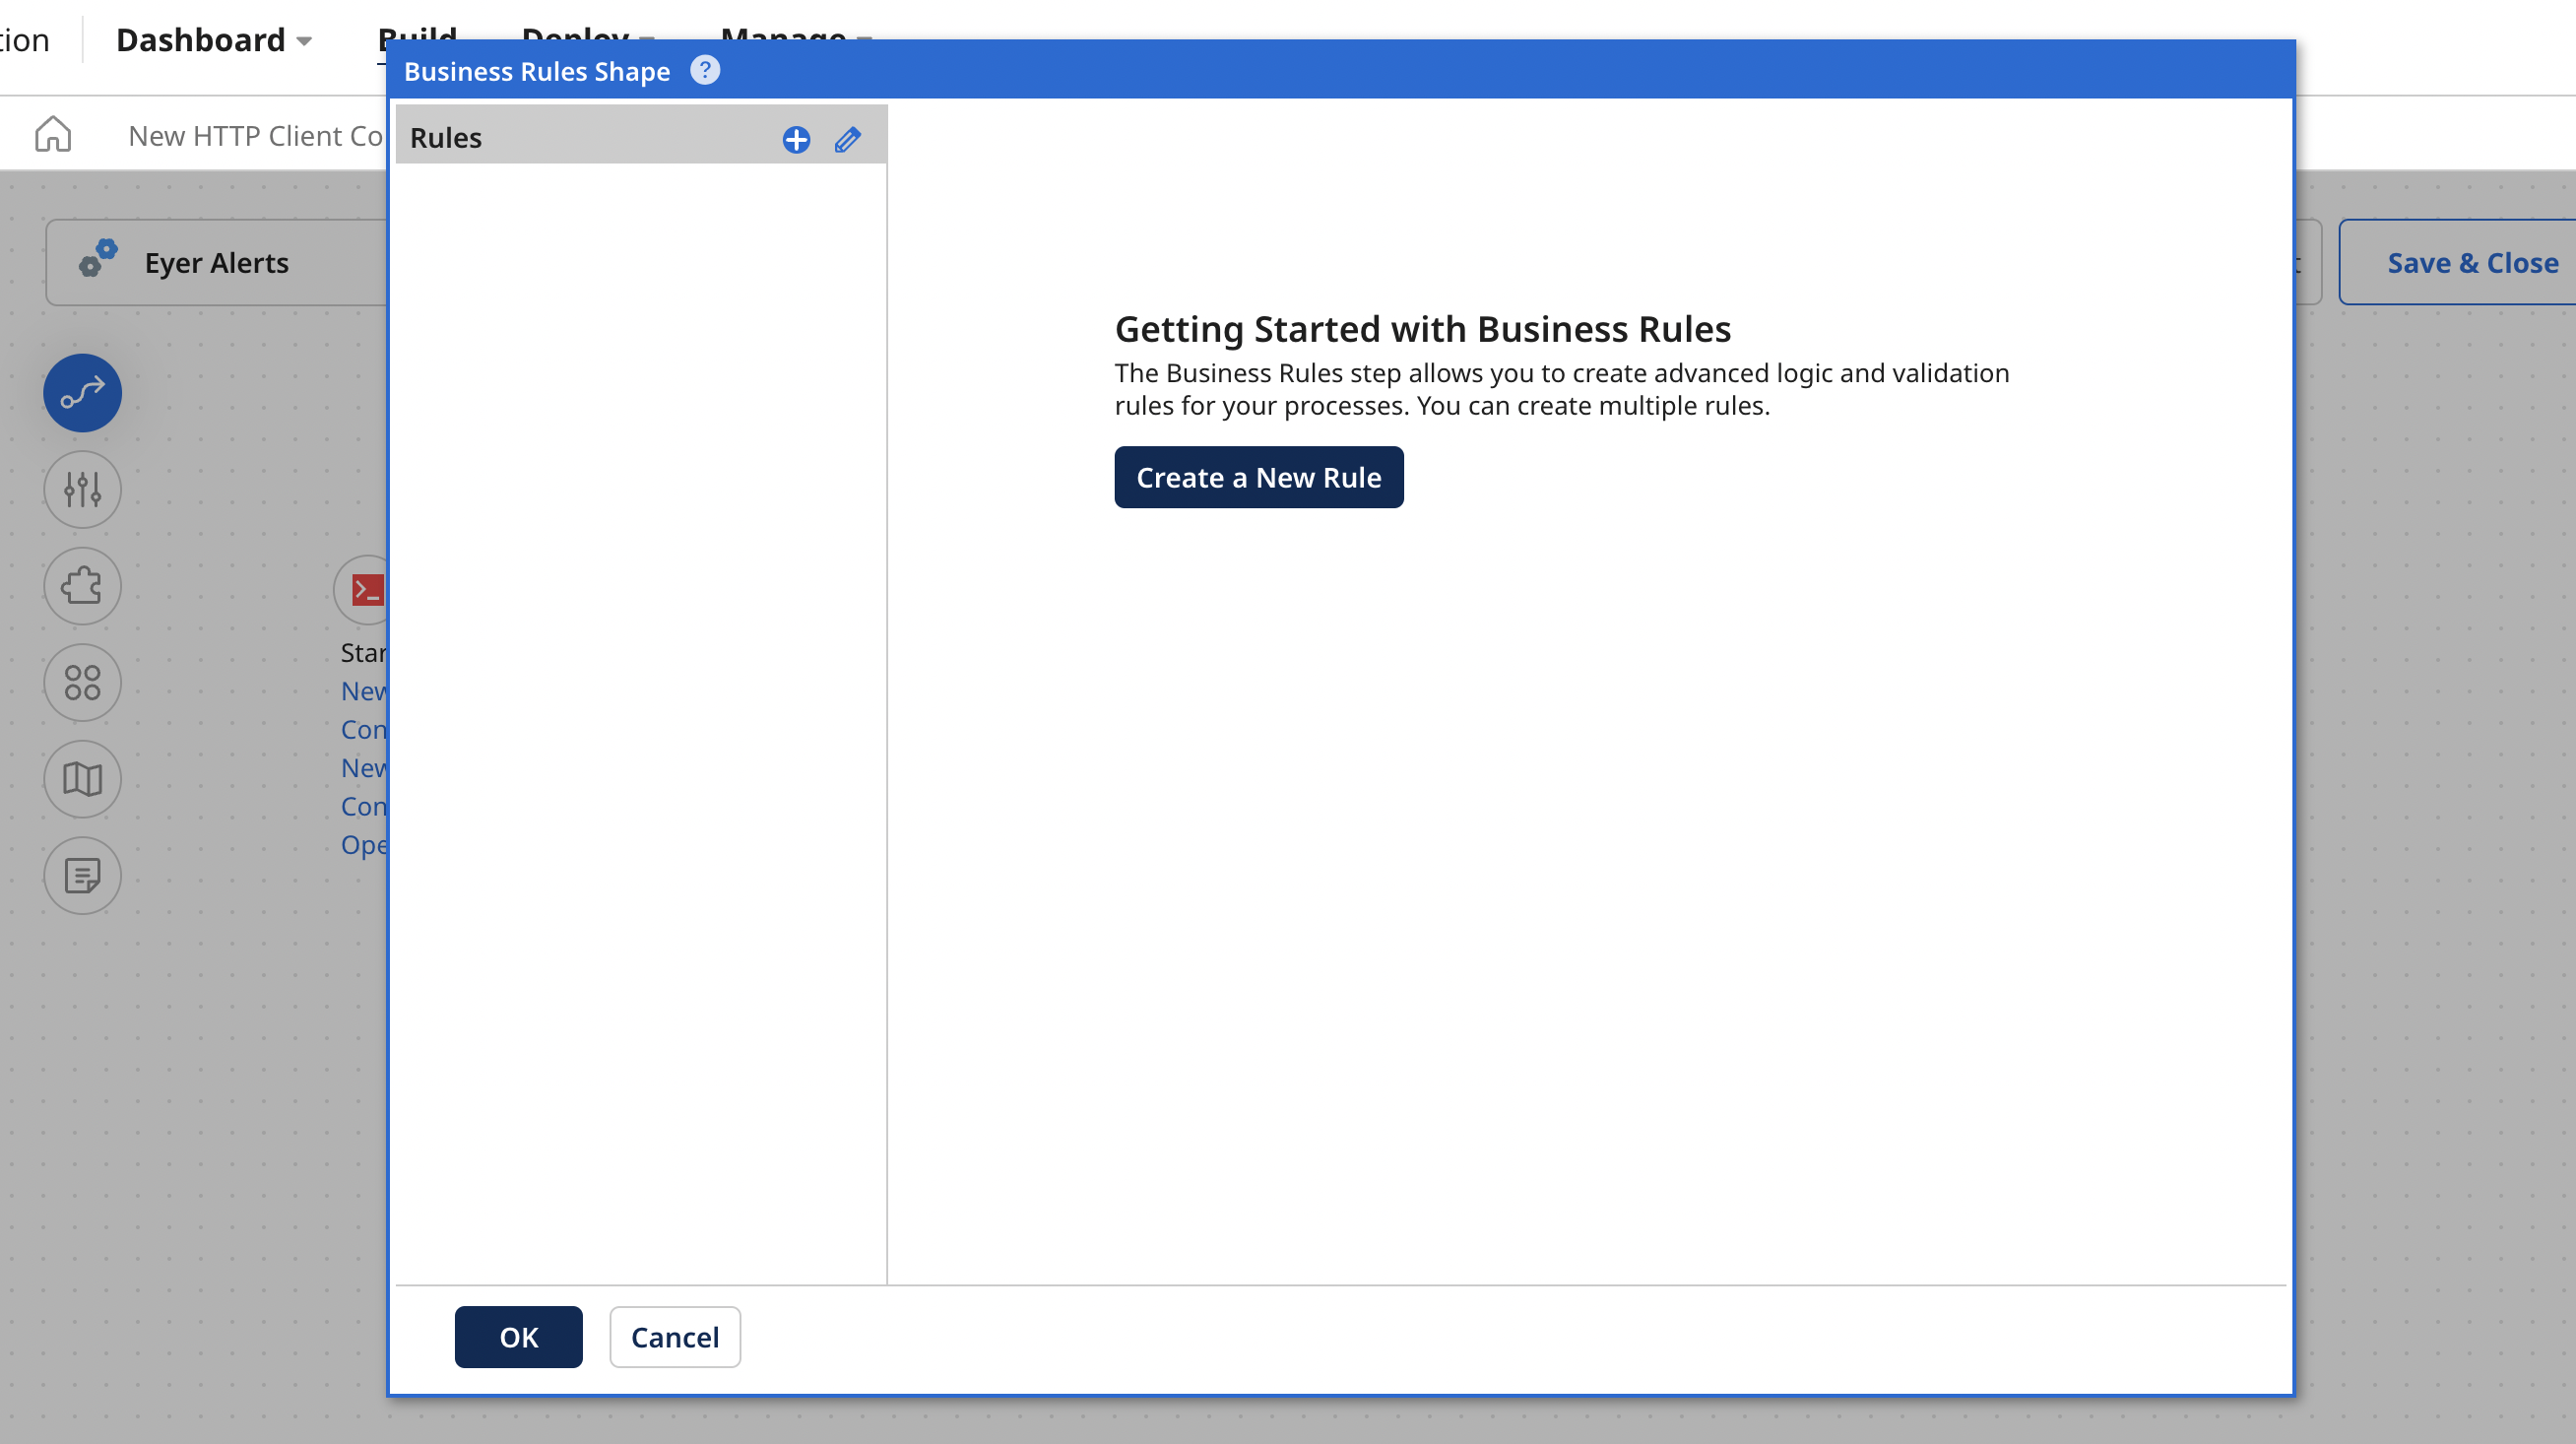
Next, click the OK button to open the Business Rules Shape modal. In this modal, click the Create a New Rule button to create a closed business rule.
Next, click the Add dropdown. In this dropdown, select Field from the menu.

This action will open an Add a field modal. In this modal, input an Alias of “ClosedAnomaliesSystem”.
Next, click the Field input area to open the New Input modal menu. Navigate through the menu by selecting Object -> closed -> Array -> items1 -> Object -> items -> Array -> items1 -> Object -> node -> Object -> system -> Object -> name.
add an image
Click the** OK -> OK **button to save the field.
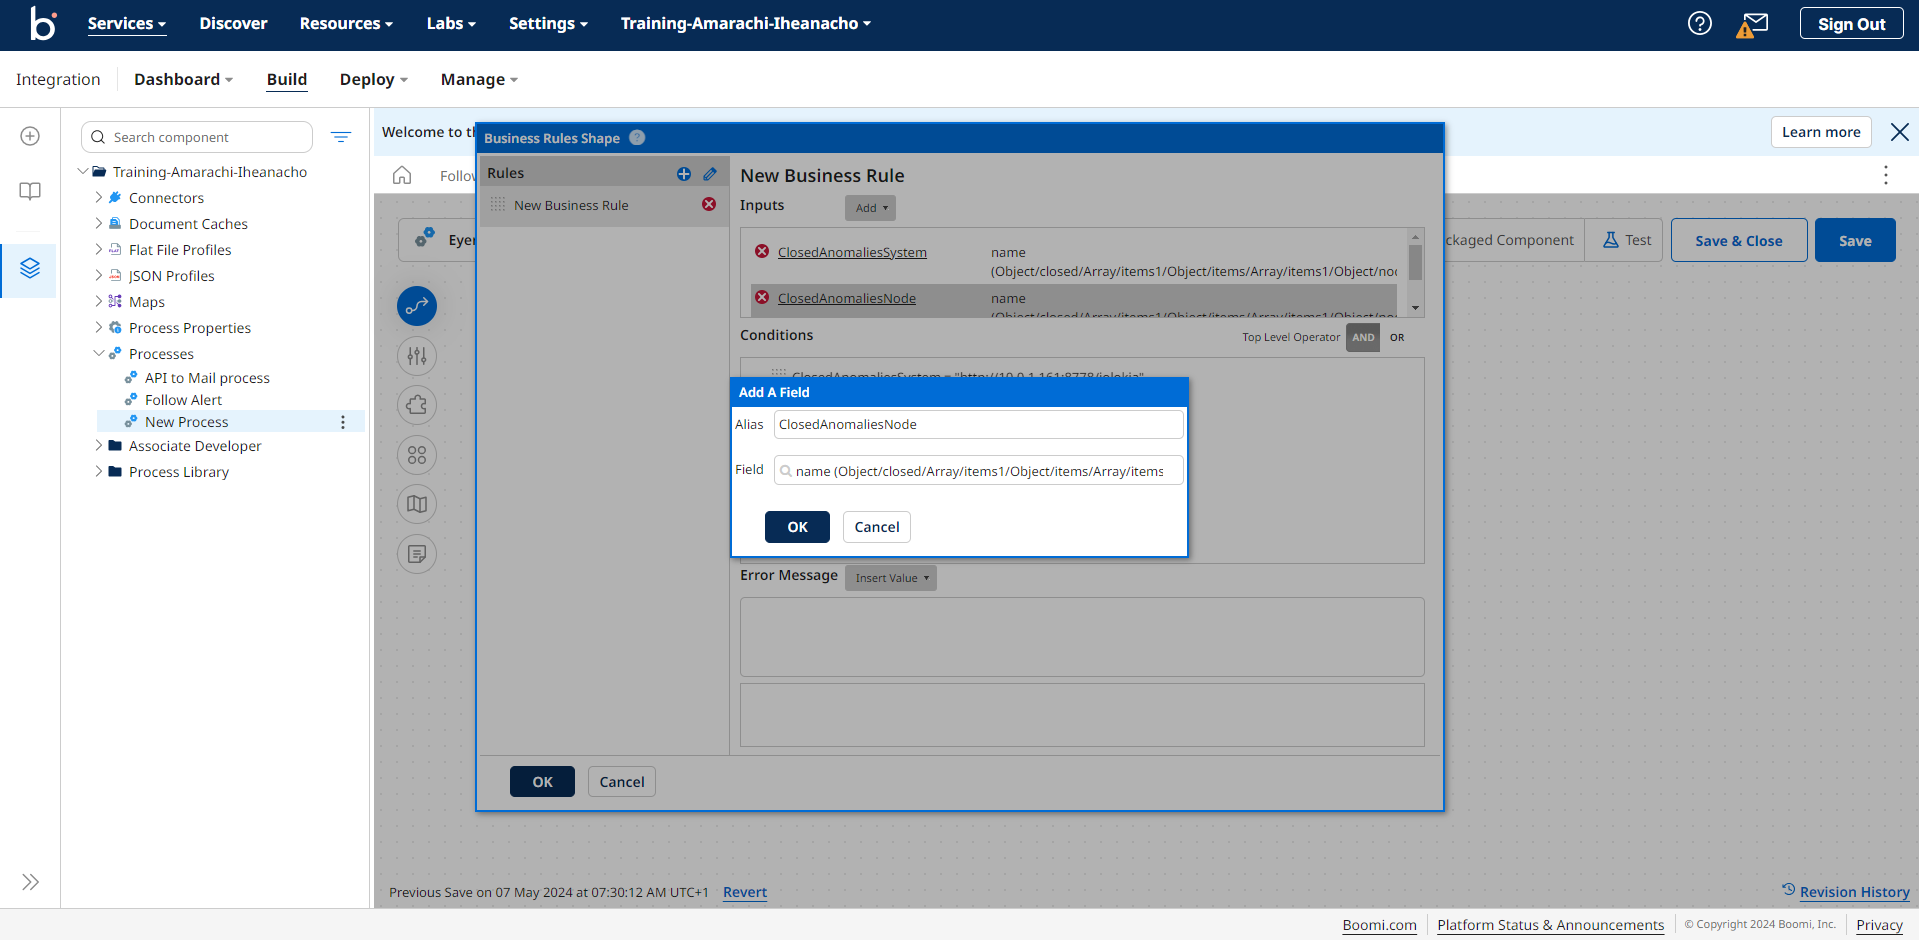
Next, create another field to capture the specific node where the anomaly occurred. Similar to creating the ClosedAnomaliesSystem field, select the Field menu from the **Add **dropdown.
This action opens up an Add a field modal; in this modal, input “ClosedAnomaliesNode” in the Alias field.
Then, click the Field input area to open a New Input modal menu. within this modal. Navigate through the menu by selecting Object -> closed -> Array -> items1 -> Object -> items -> Array -> items1 -> Object -> node -> Object -> name.
Click the OK -> OK button to save the ClosedAnomaliesNode field.
Next, create the last field to capture the severity of the anomalies. As you’ve done for the last two fields, select the Field menu from the Add dropdown.
This action opens up an Add a field modal; in this modal, input “ClosedAnomaliesSeverity” in the Alias field.
Then, click the Field input area to open the New Input modal menu. within this modal. Navigate through the menu by selecting Object -> closed-> Array -> items1 -> Object -> severity.

Click the OK -> OK button to save the options.
Once you've created the fields, you need to define the conditions that will trigger an alert. These conditions will check if the values in the fields match your criteria for receiving alerts.
Here are the three conditions you would define for this use case:
- The first condition verifies if the ClosedAnomaliesSystem field matches the specific system you're interested in monitoring
- The second condition ensures the nodes involved in the anomaly alerts are the ones you care about. You'll use the ClosedAnomaliesNode field to check this.
- The third condition confirms if the anomaly's severity level meets your threshold.
To create a new condition, perform the following processes:
- Click the Add a Condition link:
- In the first dropdown, select the ClosedAnomaliesSystem field
- In the second dropdown, select the = field
- In the third dropdown, select the Static field
- In the fourth field, input the name of the System you care that the anomalies come from
- Click the Save button
Click the AND operator, then repeat the create a new condition process for the ClosedAnomaliesNodes field. The differences to make are:
- In the first dropdown, input NewAnomaliesNodes
- In the fourth field, input the name of the node you are looking for
Click the AND operator, and repeat the create a condition process for the ClosedAnomaliesSeverity field. The differences to make are:
- In the first dropdown, input AnomaliesSeverity
- In the second dropdown, choose the != operator
- Leave the fourth field empty.
This ensures that the severity field of the anomaly alerts is not empty.
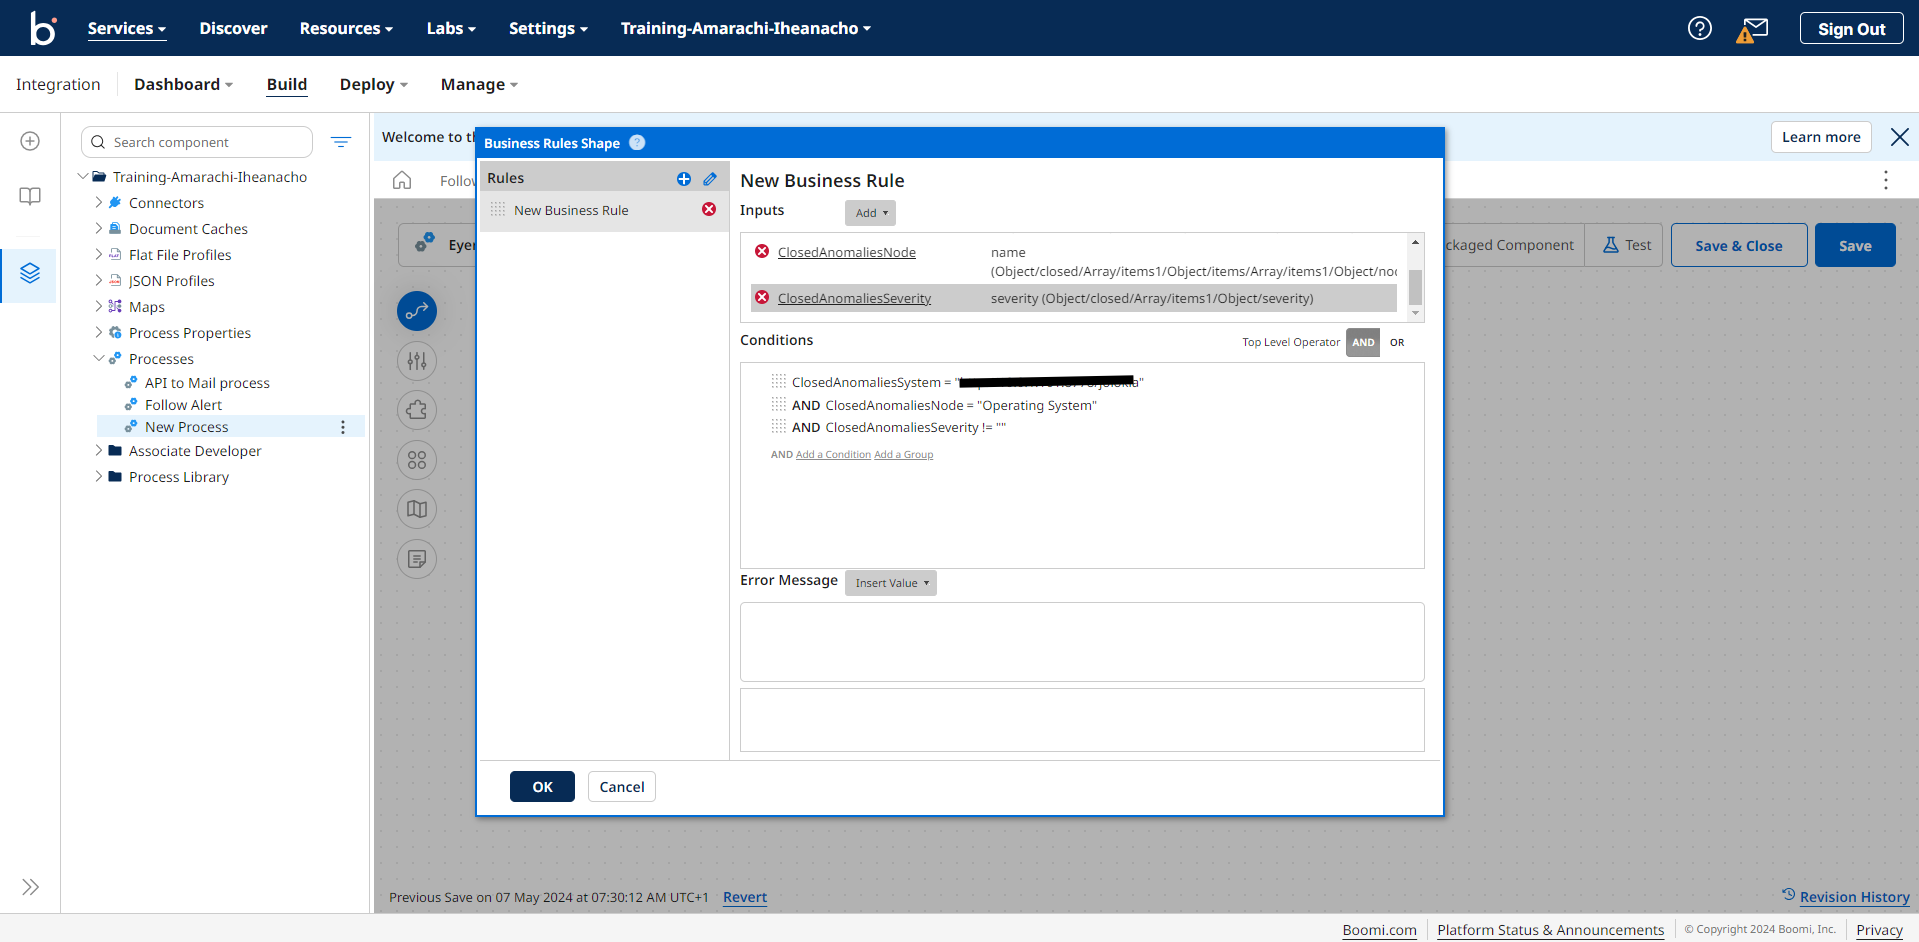
Click the OK button to save the Business rules. Here is what your Business Rules shape should look like.
Getting the Alerts
The Boomi ecosystem offers many connectors that you can use to receive information on anomalies, with the most popular way of receiving these alerts being the Mail connector. Check out the Boomi documentation to learn how to connect and configure your Mail connector.
The Boomi process checks if the rules defined in the Business Rules Shape are met. If the anomalies meet the criteria, an alert is sent. Otherwise, the process ends.